Montaje fácil y seguro de equipos Campbell


Resumen
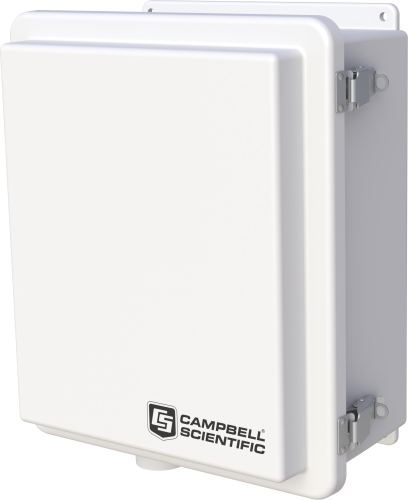
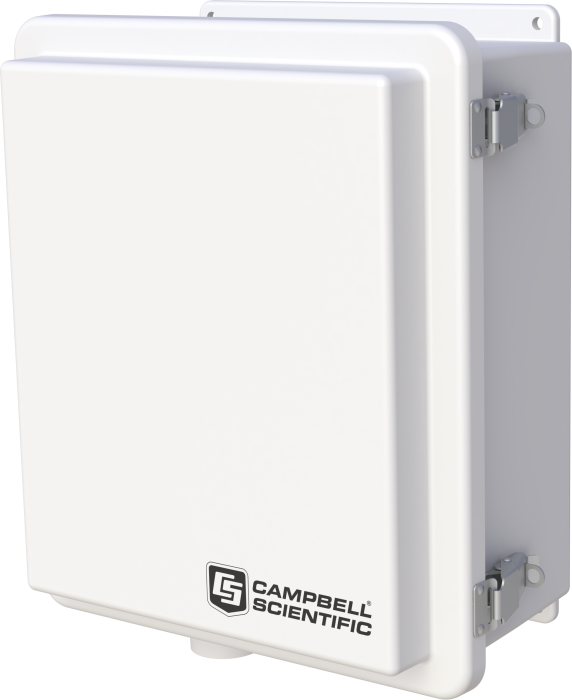
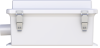
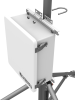
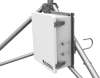
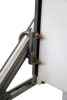
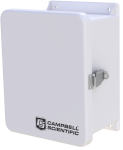
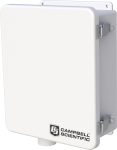
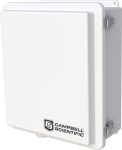
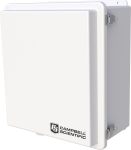
El armario ENC12/14 es de tamaño medio y se ha convertido en el modelo más popular utilizado por nuestros Clientes. En su interior podemos albergar un datalogger, fuente de alimentación y uno o más periféricos.
Leer másVentajas y características
- Para uso en intemperie, y para proteger los instrumentos
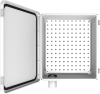
- Placa de montaje diseñada de forma que sea fácil fijar componentes Campbell Scientific
- Armario color blanco, estabilizado UV que refleja la radiación solar—reduciendo los gradientes de temperatura dentro del armario sin necesidad de un protector para la radiación
Imágenes


Ficheros CAD:
Descripción detallada
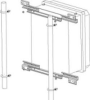
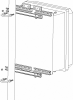
The ENC12/14's backplate is prepunched with one-inch-on-center holes suitable for attaching a datalogger, power supply, and a communications or measurement and control peripheral.
Preguntas frecuentes
Número de FAQs relacionadas con ENC12/14: 14
Expandir todoDesplegar todo
-
If you purchased a Stahlin enclosure from Campbell Scientific and it has a failed gasket, we can help you. We will need you to provide an image of the failed gasket, verify the size of your enclosure, and provide your contact information. We can then arrange to have a replacement gasket sent to you from Stahlin. For assistance, contact Technical Support at 435.227.9100.
-
The terminals do not need to be replaced. Just sand or file the corrosion away, exposing clean copper, and the fittings will continue to be functional.
-
Is a fiberglass enclosure suitable for an installation in a very cold location monitoring corrosion?Our fiberglass enclosures can withstand very cold locations, and their fiberglass/plastic construction is very resistant to corrosion.
-
It depends on the device. Most devices have built-in mounting flanges, but some items require a separate mounting bracket.
-
The putty is shipped as part of the 7363 Enclosure Supply Kit. To order an additional 4 ounce container of electrician’s putty, specify pn 6596.
-
Backplates are available in sizes designed to fit in Campbell Scientific enclosures: 10 x 12 in., 12 x 14 in., 14 x 16 in., and 16 x 18 in.
-
Yes. Each enclosure Campbell Scientific sells has a powder-coated backplate with holes on 1 in. centers that match the mounting flanges on our equipment for easy mounting.
-
There is not an easy way to calculate how much desiccant is needed in an enclosure or how quickly the desiccant will need to be replaced. The following conditions affect the replacement interval:
- How much humidity the enclosure is exposed to
- The size of the enclosure
- How often the enclosure door is opened and how long the door remains open
- How airtight the enclosure is
It may be advantageous to use more than one desiccant packet at a time inside an enclosure. Campbell Scientific recommends keeping an extra supply of desiccant on hand for as-needed replacement in the enclosure.
-
The following information is applicable to many of Campbell Scientific’s standard enclosures and prewired enclosures.
Note: The procedure below will not work for torn or damaged seals.
To make a field repair to a loose gasket on an enclosure, first acquire an adhesive, such as standard Gorilla Glue, that is rated for use with polyurethane foam. The adhesive should be compatible with, and recommended for, use with polyurethane foam. Follow these steps:
- Pull the gasket away from the gasket channel, being careful not to tear the gasket. The gasket does not need to be removed completely. Rather, remove only those areas that have pulled loose on their own. To keep the gasket up out of the way, lay a small object (such as a toothpick, pen, or pencil) horizontally across the channel.
- Using an adhesive that is rated for use with polyurethane foam, apply a small bead of adhesive to the gasket channel. Because the adhesive’s only function is to keep the gasket in place, use it sparingly.
- Remove any objects that were holding the gasket out of the way.
- Carefully place the gasket in the gasket channel.
- Wait 1 to 3 hours for the adhesive to cure before closing the door.
Compatibilidad
Nota: lo siguiente muestra información de compatibilidad notable. No es una lista de todos los productos compatibles.
Dataloggers
| Producto | Compatible | Nota |
|---|---|---|
| 21X (retired) | ||
| CR10 (retired) | ||
| CR1000 (retired) | ||
| CR10X (retired) | ||
| CR200X (retired) | ||
| CR216X (retired) | ||
| CR23X (retired) | ||
| CR300 (retired) | ||
| CR3000 (retired) | ||
| CR350 | ||
| CR500 (retired) | ||
| CR5000 (retired) | ||
| CR510 (retired) | ||
| CR6 | ||
| CR800 (retired) | ||
| CR850 (retired) | ||
| CR9000 (retired) | ||
| CR9000X (retired) |
Especificaciones
| Color | White (Reflects solar radiation, reducing temperature gradients inside the enclosure without using a separate radiation shield.) |
| Construction | Fiberglass-reinforced polyester enclosure with door gasket, external grounding lug, stainless-steel hinge, and lockable hasps |
| Enclosure Classification | NEMA 4X (before being modified for cable entry, conduit, or ground lug) |
| Number of Cable-Entry Seals | 2 medium, 4 small |
| Dimensions |
|
| Weight | 5 kg (11.2 lb) |
Documentos
Folletos producto
Documentos técnicos
Casos de aplicación
Dans le cadre du volet « Prévention des crises et renforcement de la RÉSILIENCE »......leer más
The city of Frisco, Texas, sits in an area that experienced severe drought from about......leer más
The city of Frisco, Texas, sits in an area that experienced severe drought from about......leer más